
Kitchen: Episode VI – Finally
The final step of our kitchen project – the serving (okay never mind that metaphor sucks 🙈).
I finally have the time to write about the final step of our kitchen project – the serving (okay never mind that metaphor sucks 🙈).
If you want, you can catch-up on the previous episodes here:
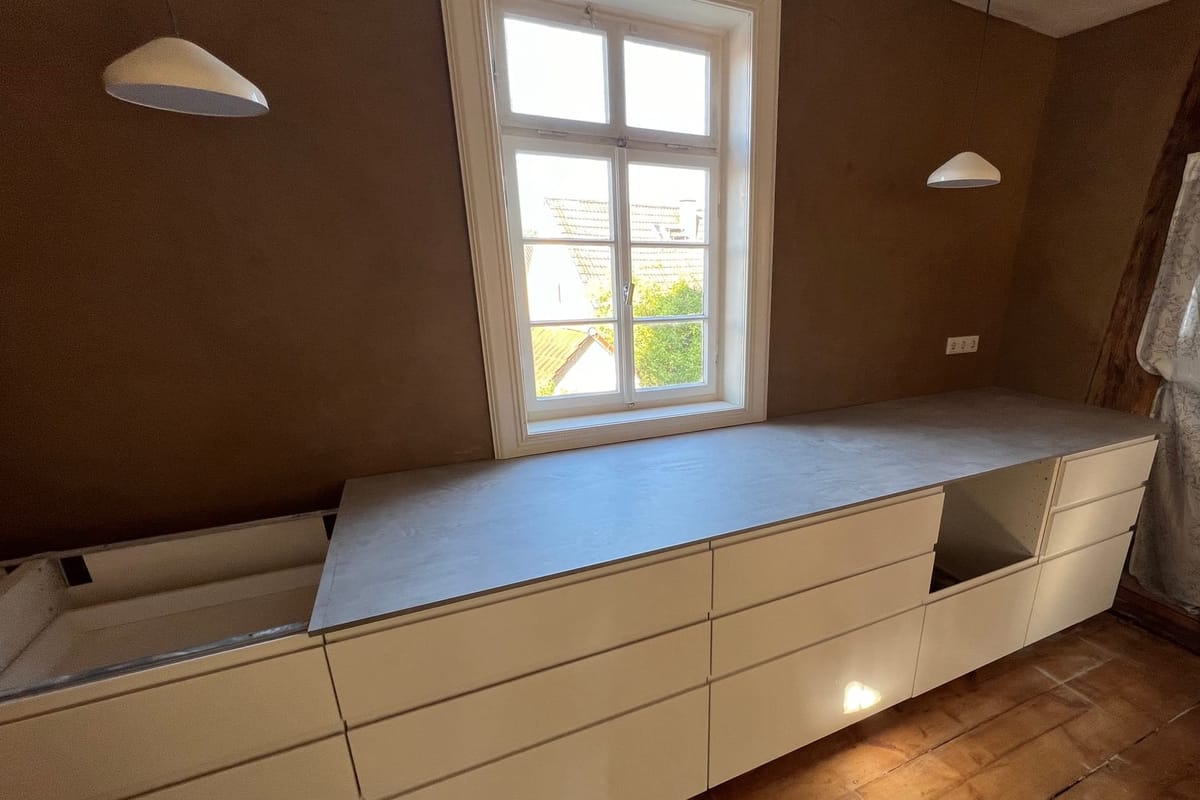
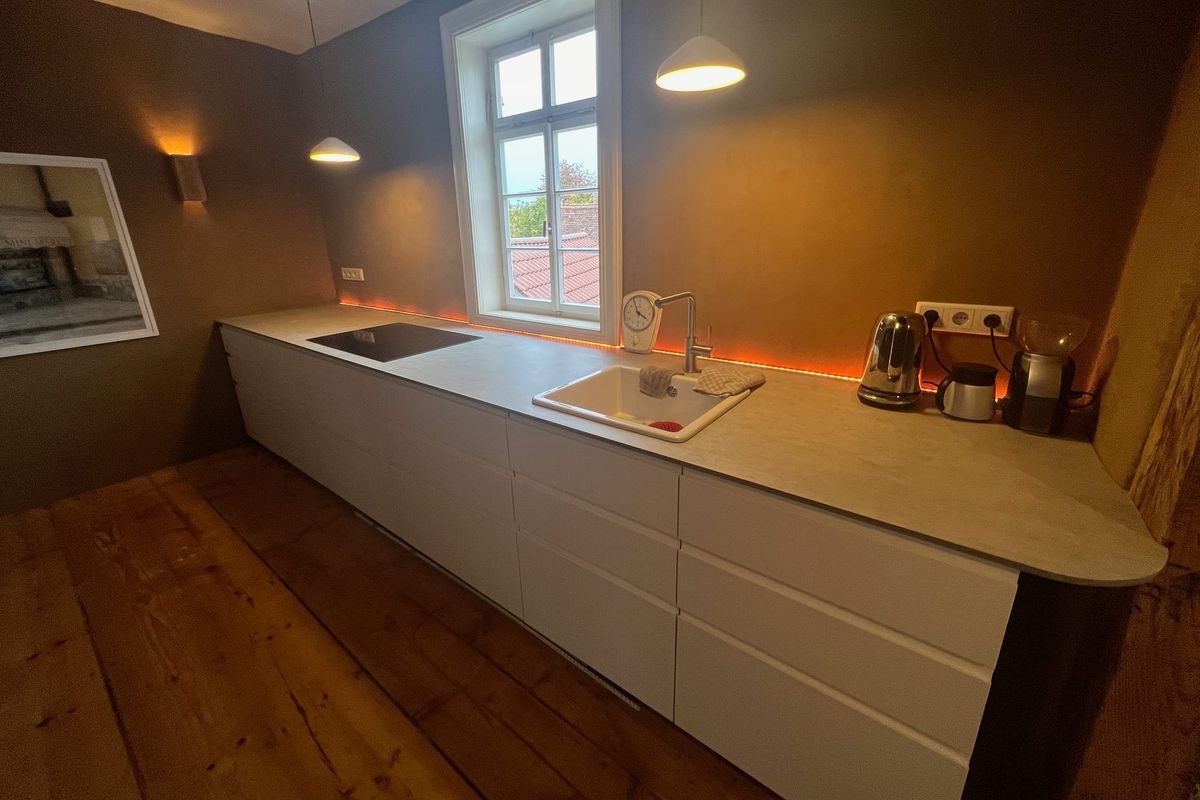
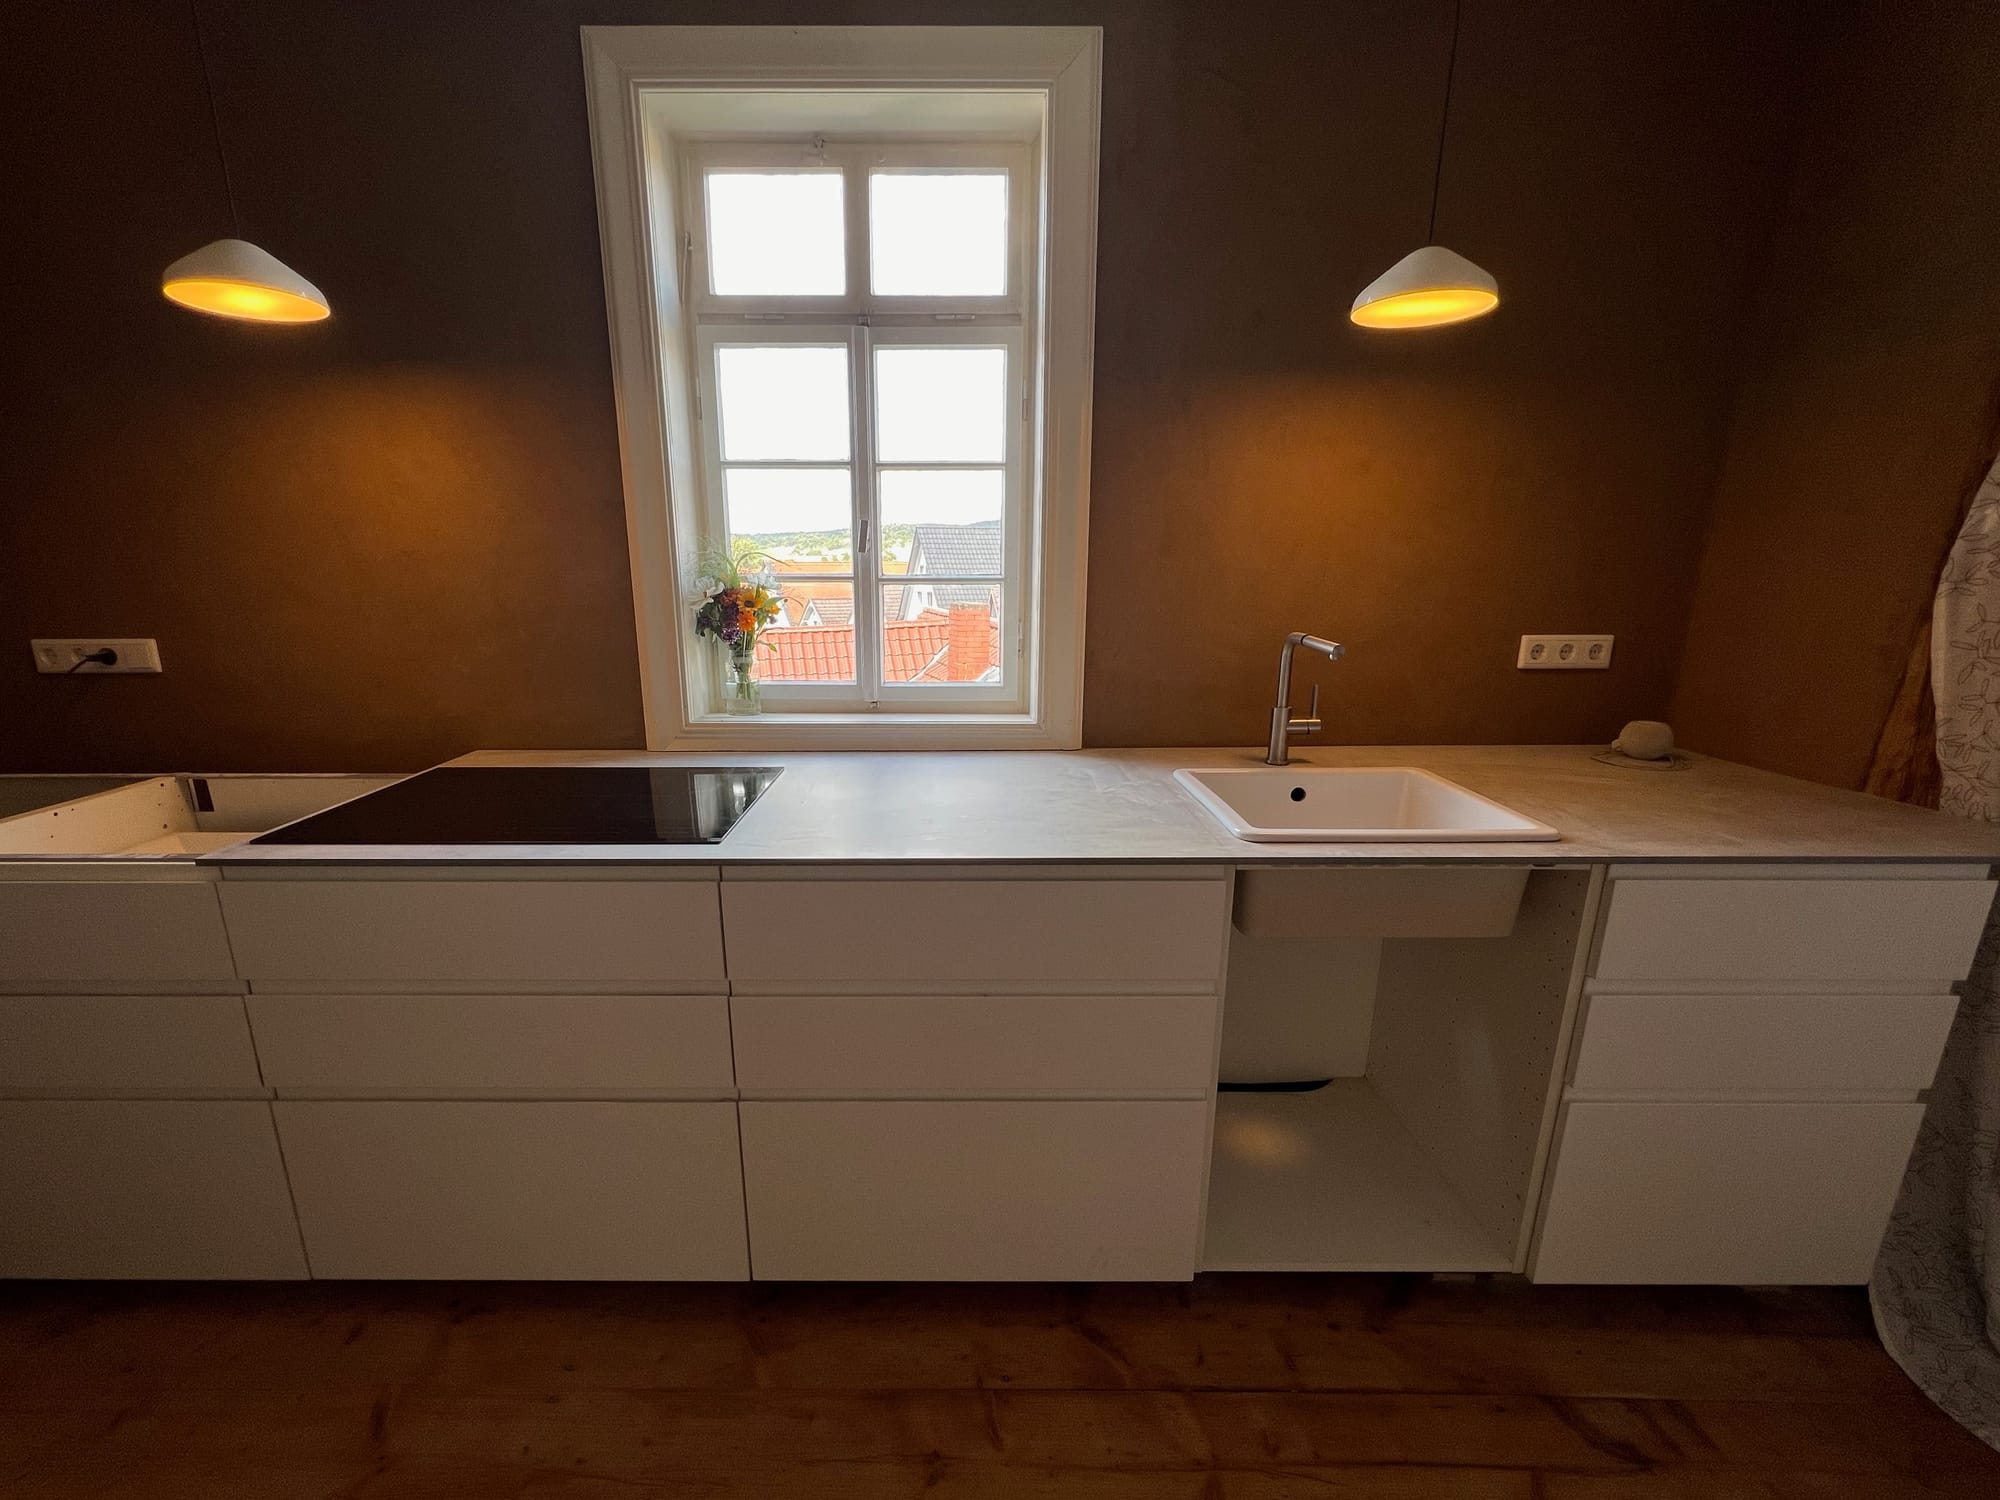
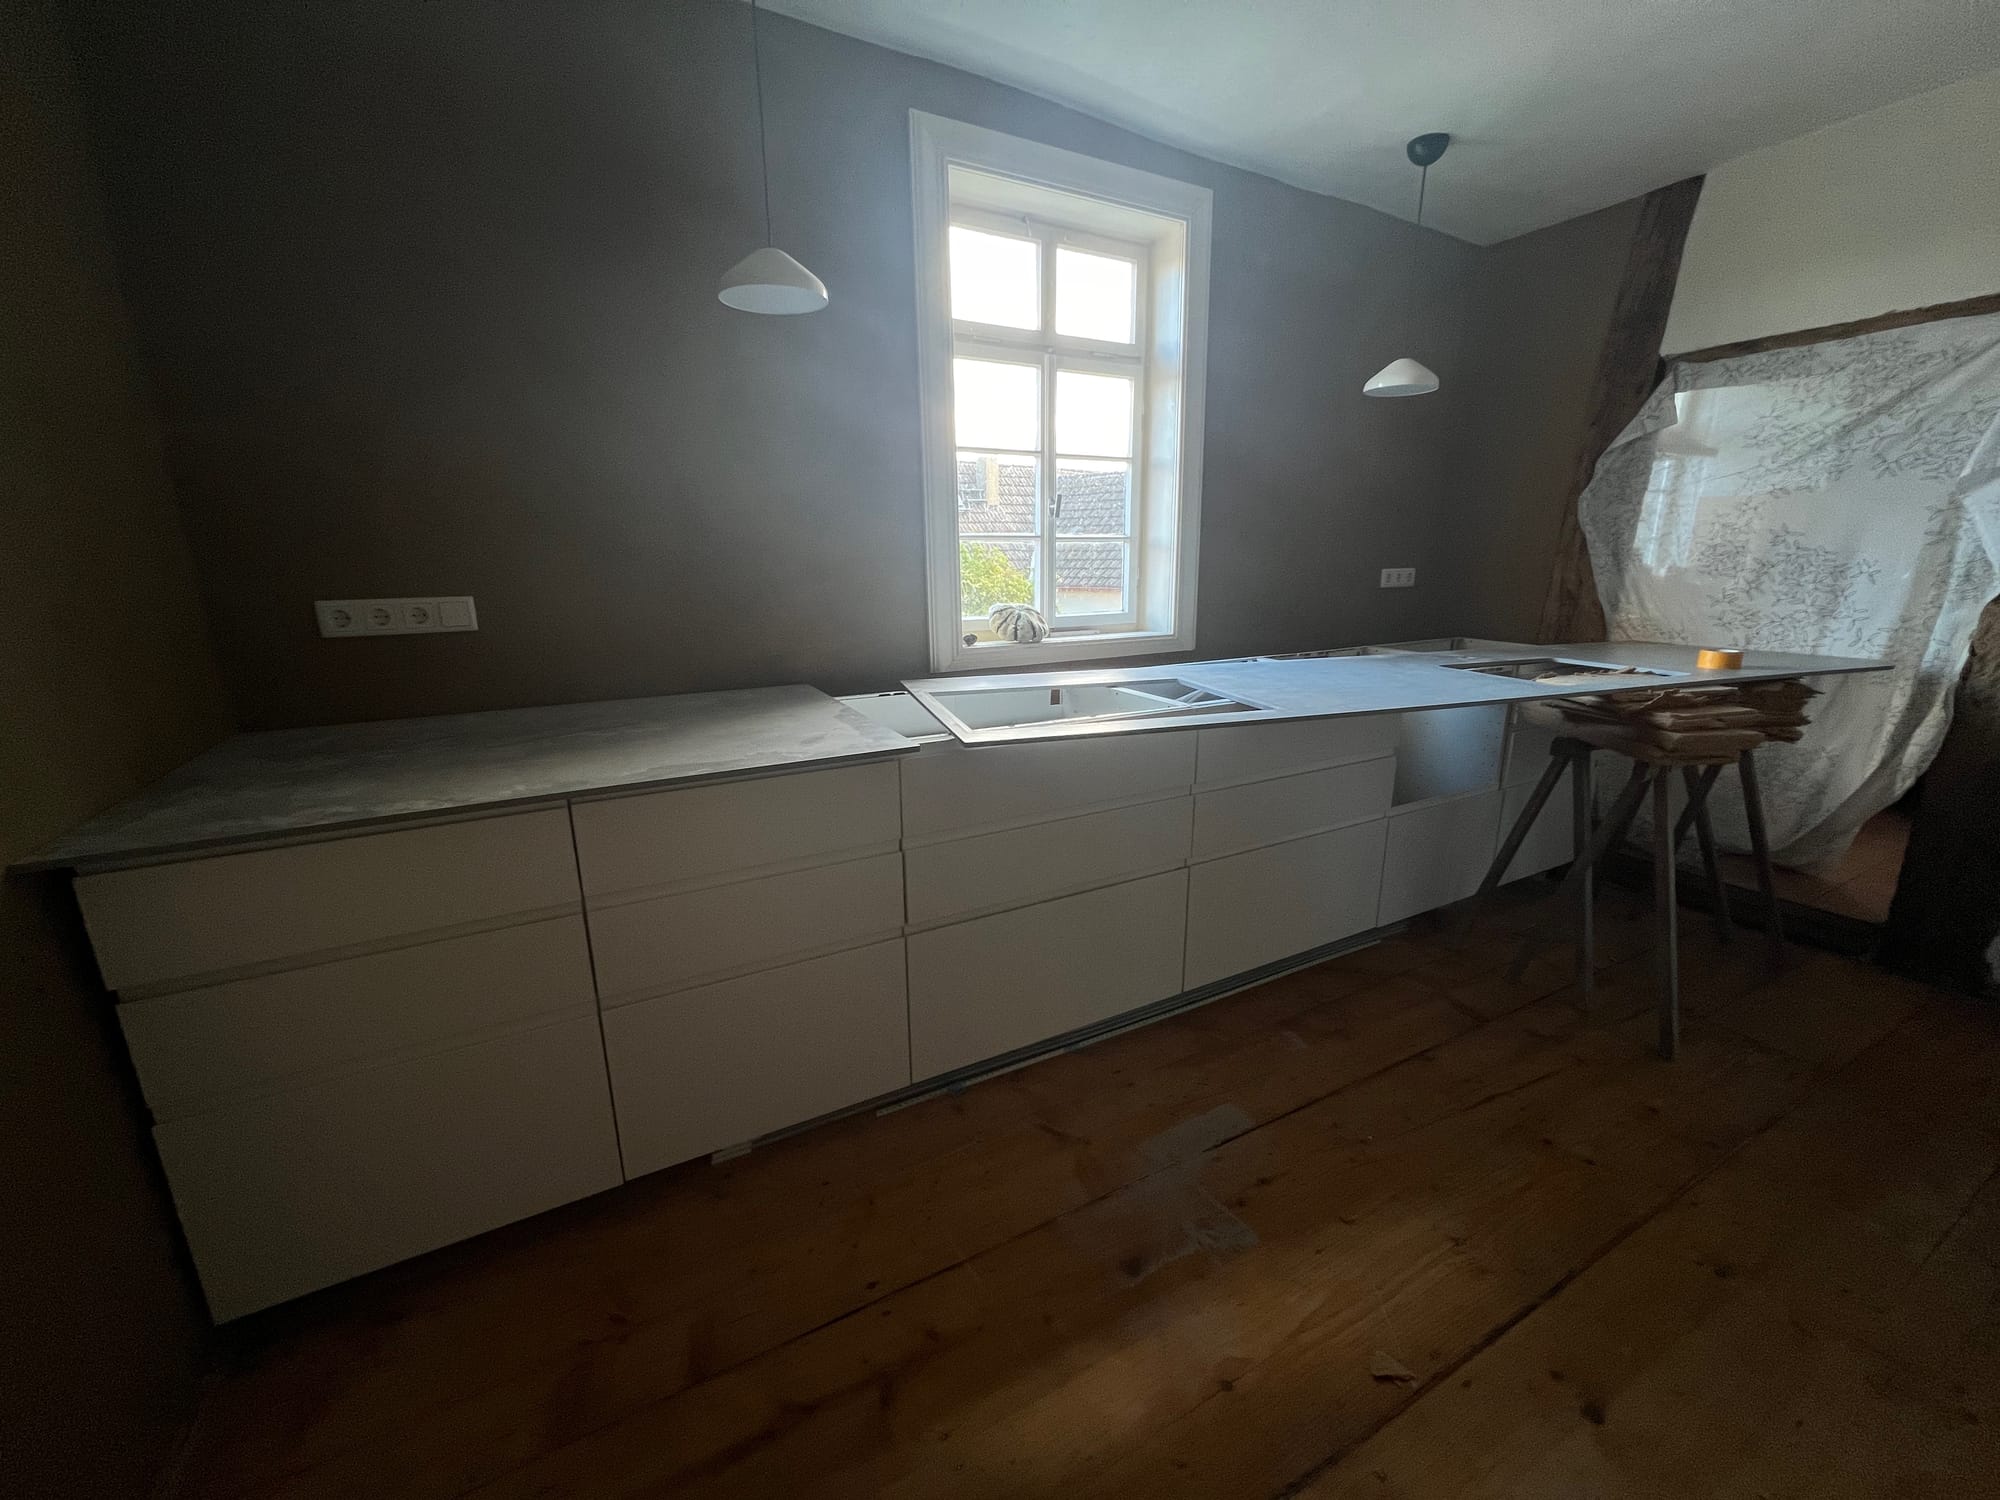
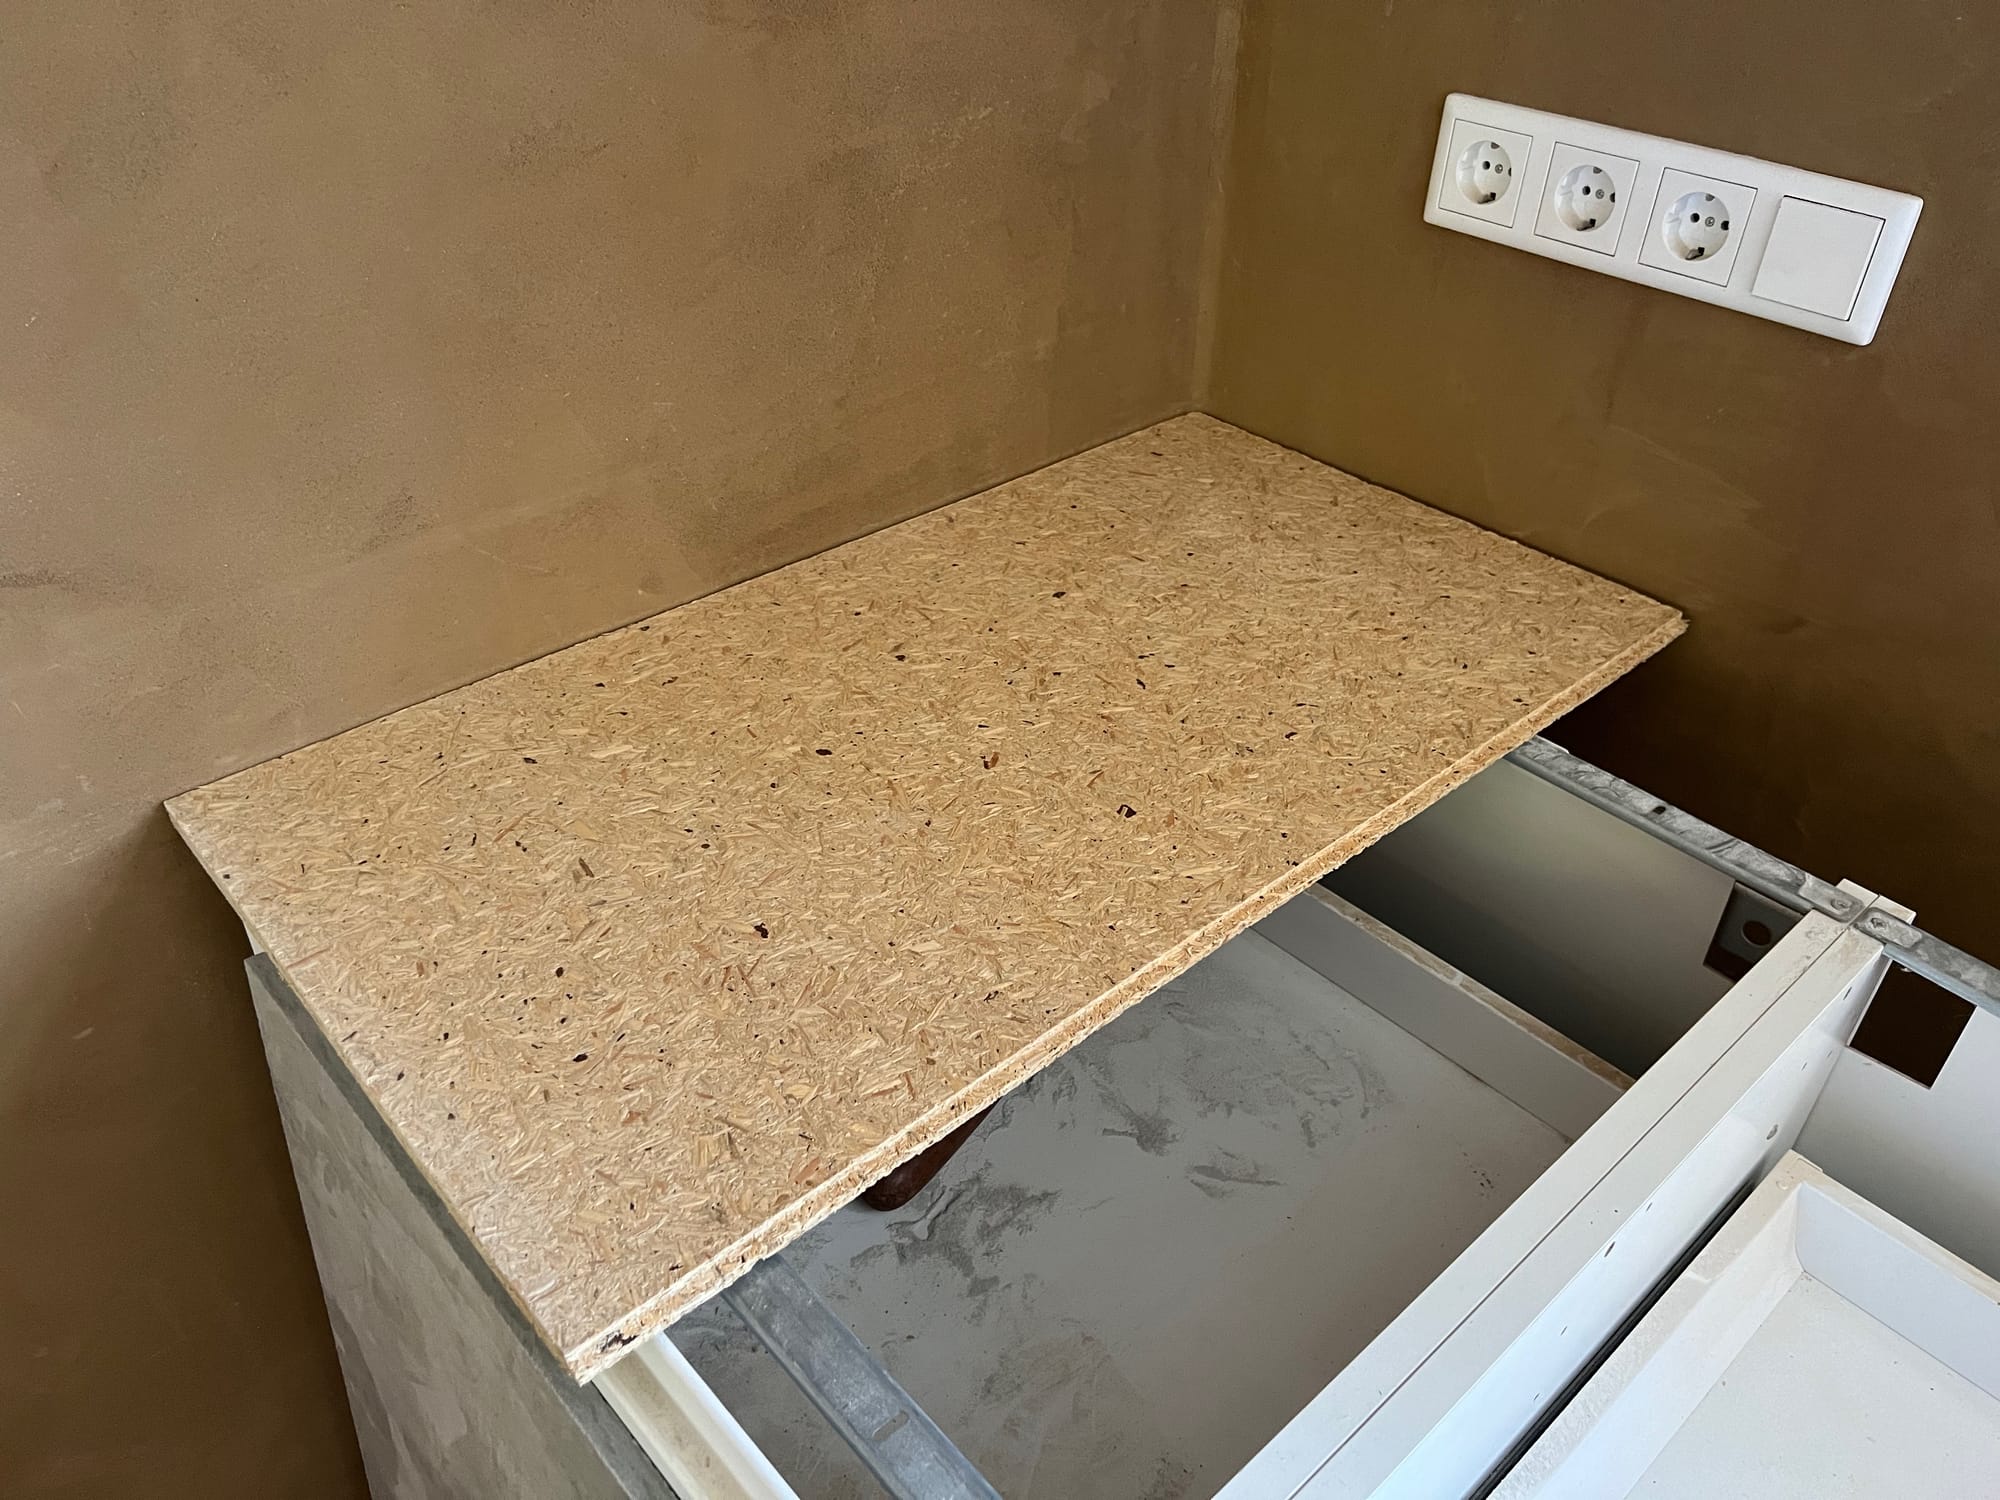
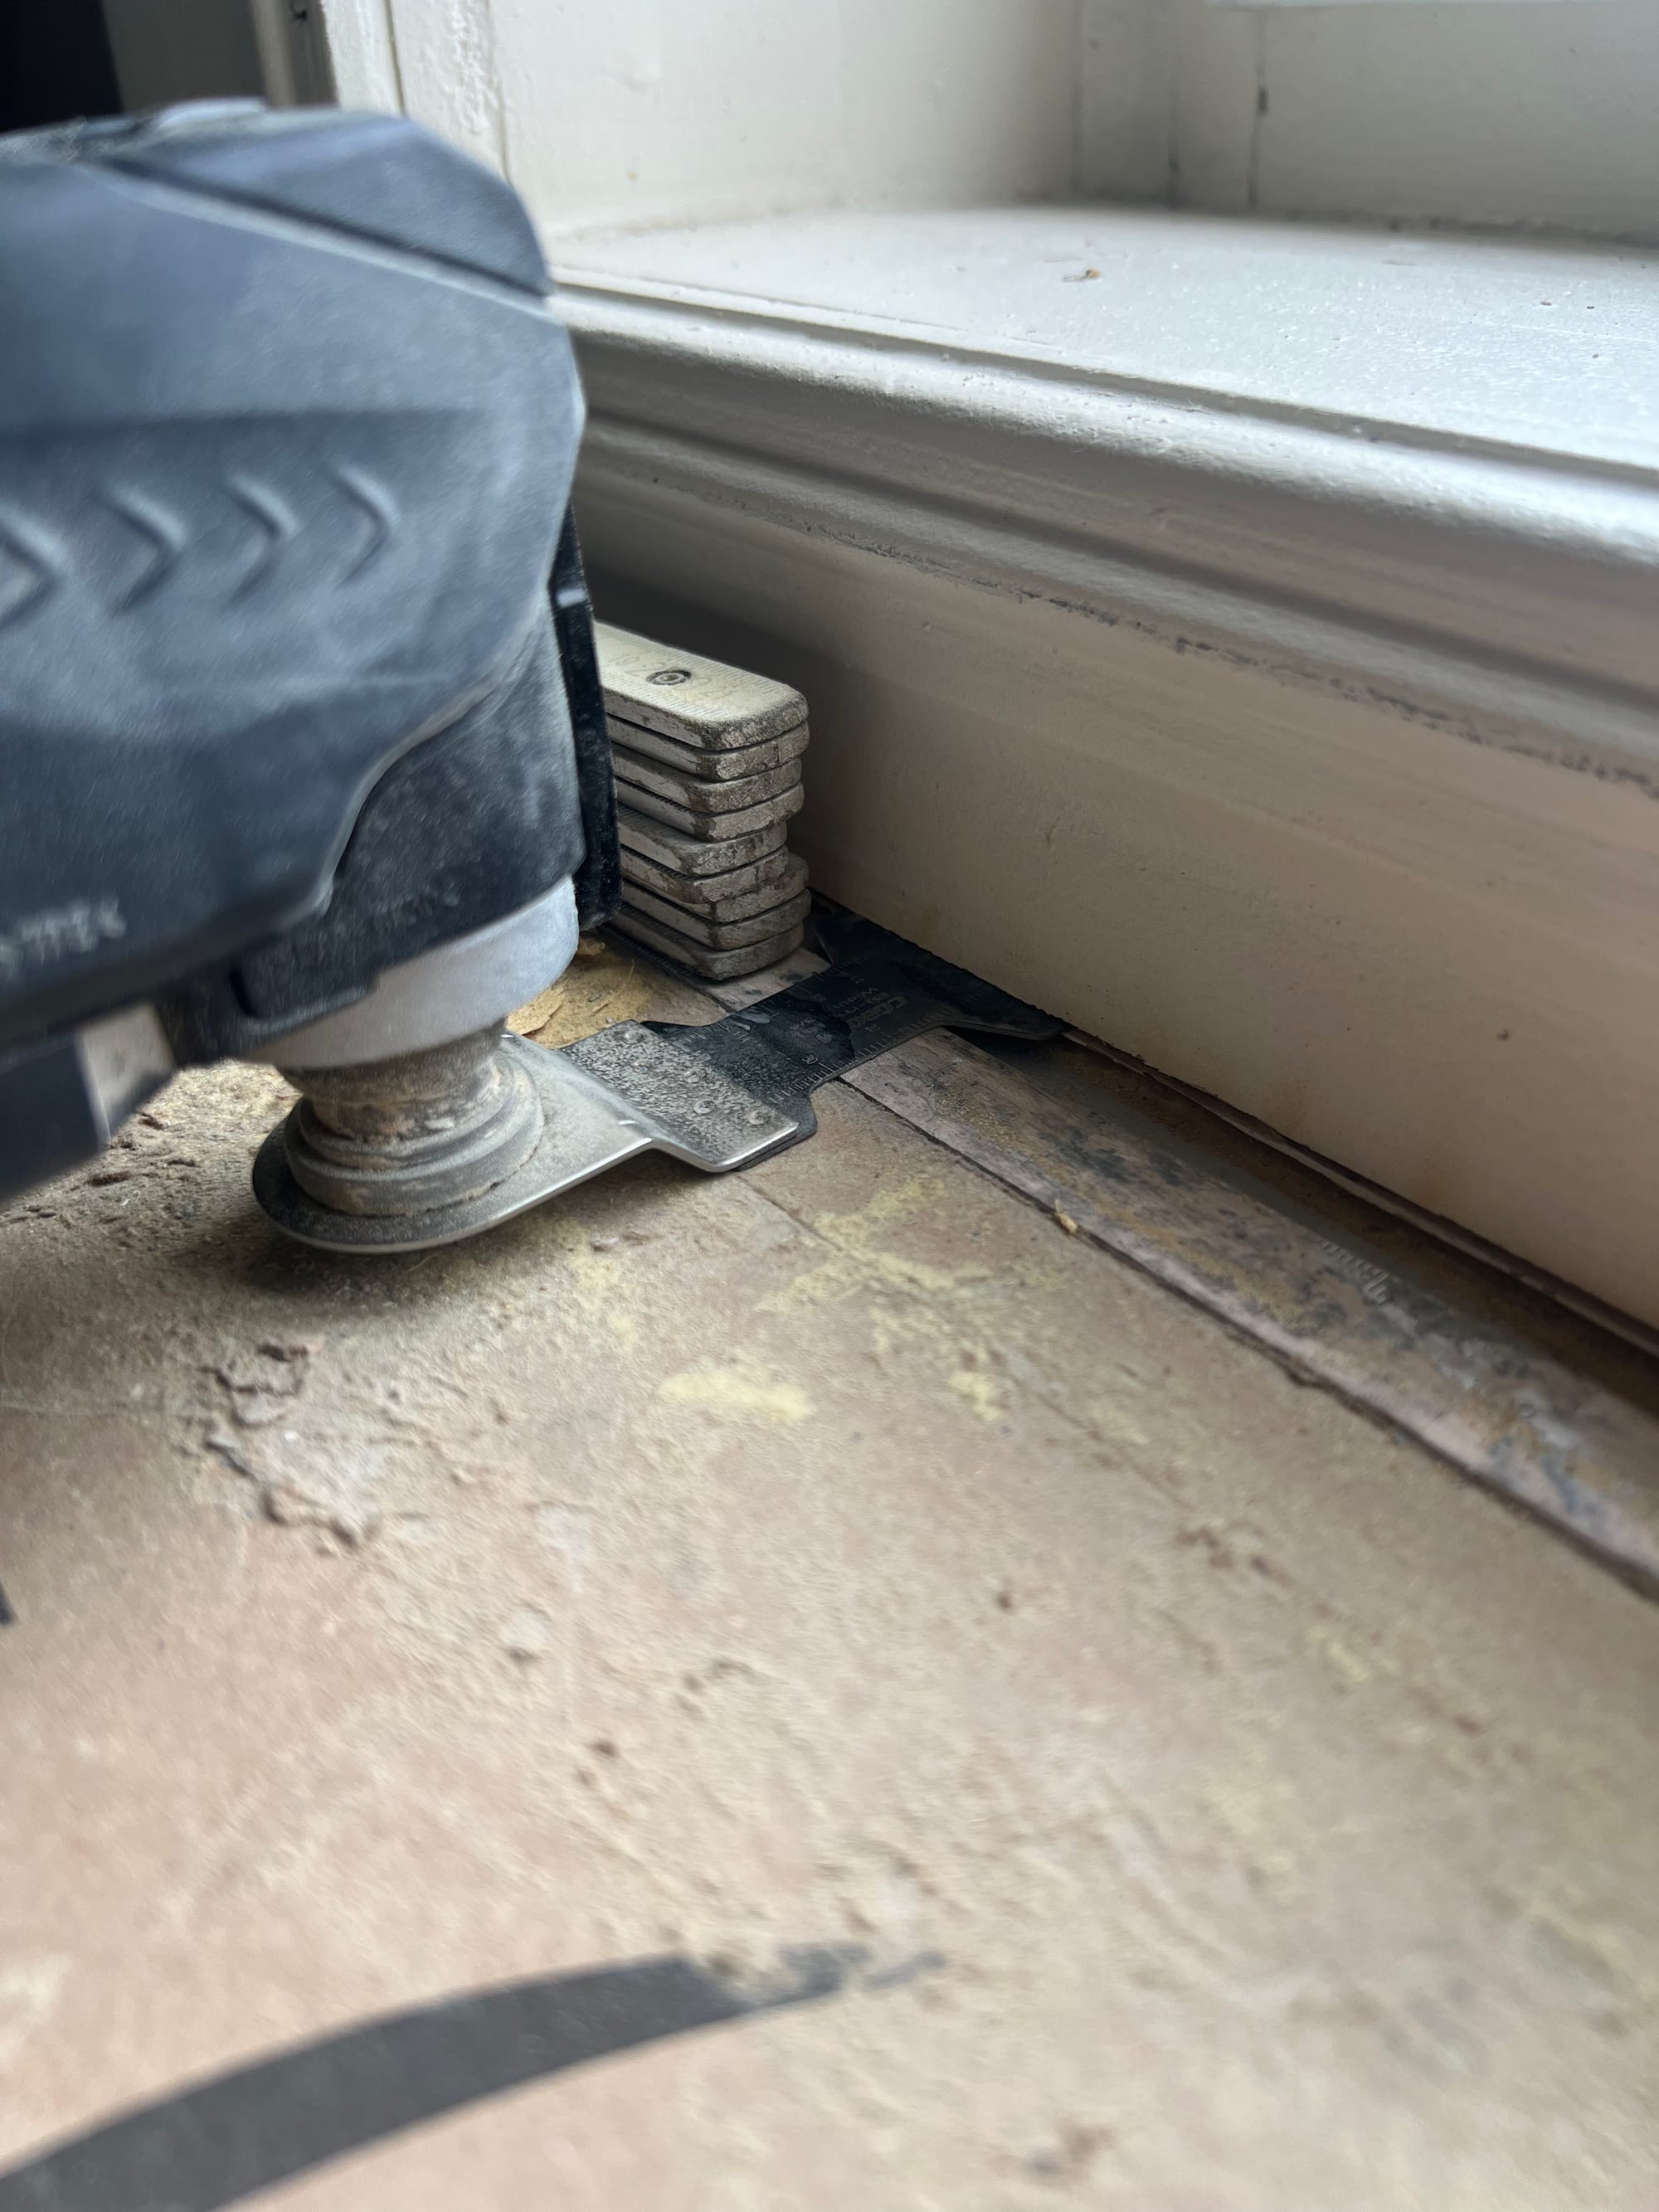
In the last episode we assembled the first part of the worktop so the next step was to cut holes into it again for the sink (Ikea), faucet (Blanco Lanora) and the induction cooking field (Ikea). Although I hate the noise and fine dust it makes – the best tool for that was still the hand-held router. The process was pretty straightforward and luckily I didn’t mess up any of the measurements 😅. I was a bit concerned about how close to the edge we needed to place the cooking field, but in the end it turned out to be no issue at all.
Joining the Worktop
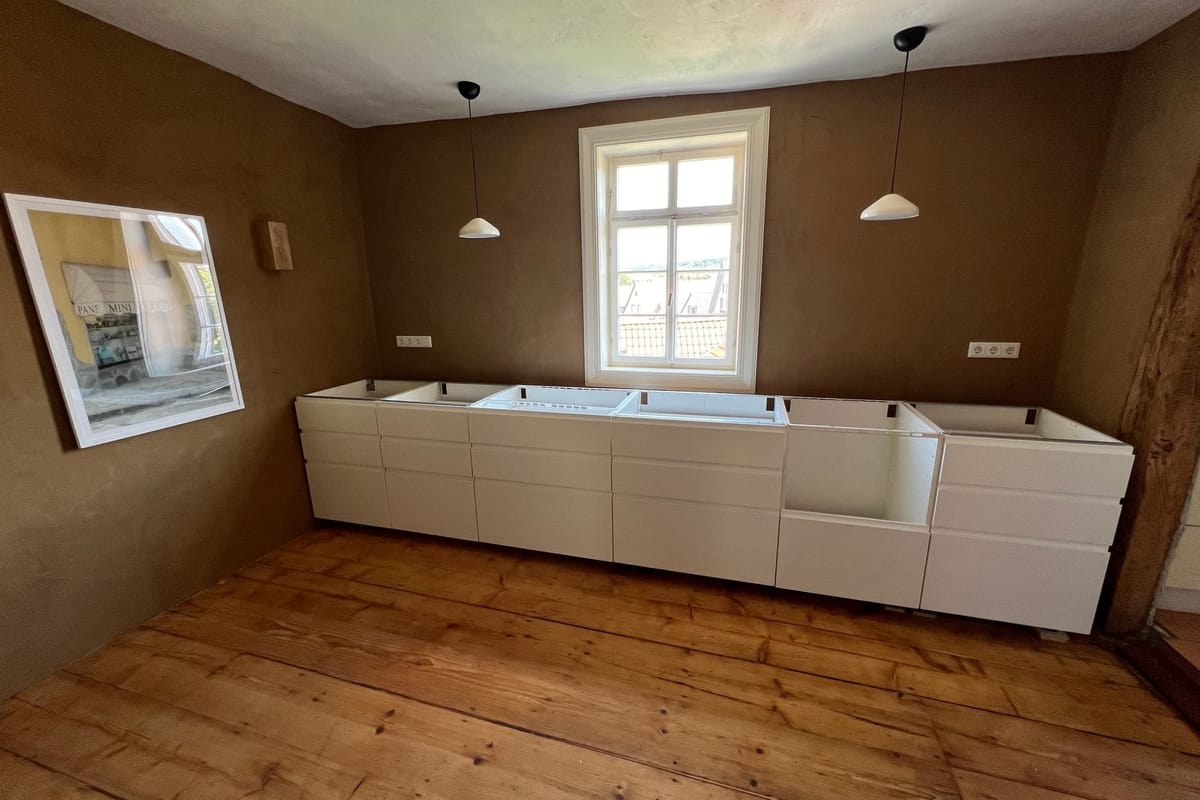
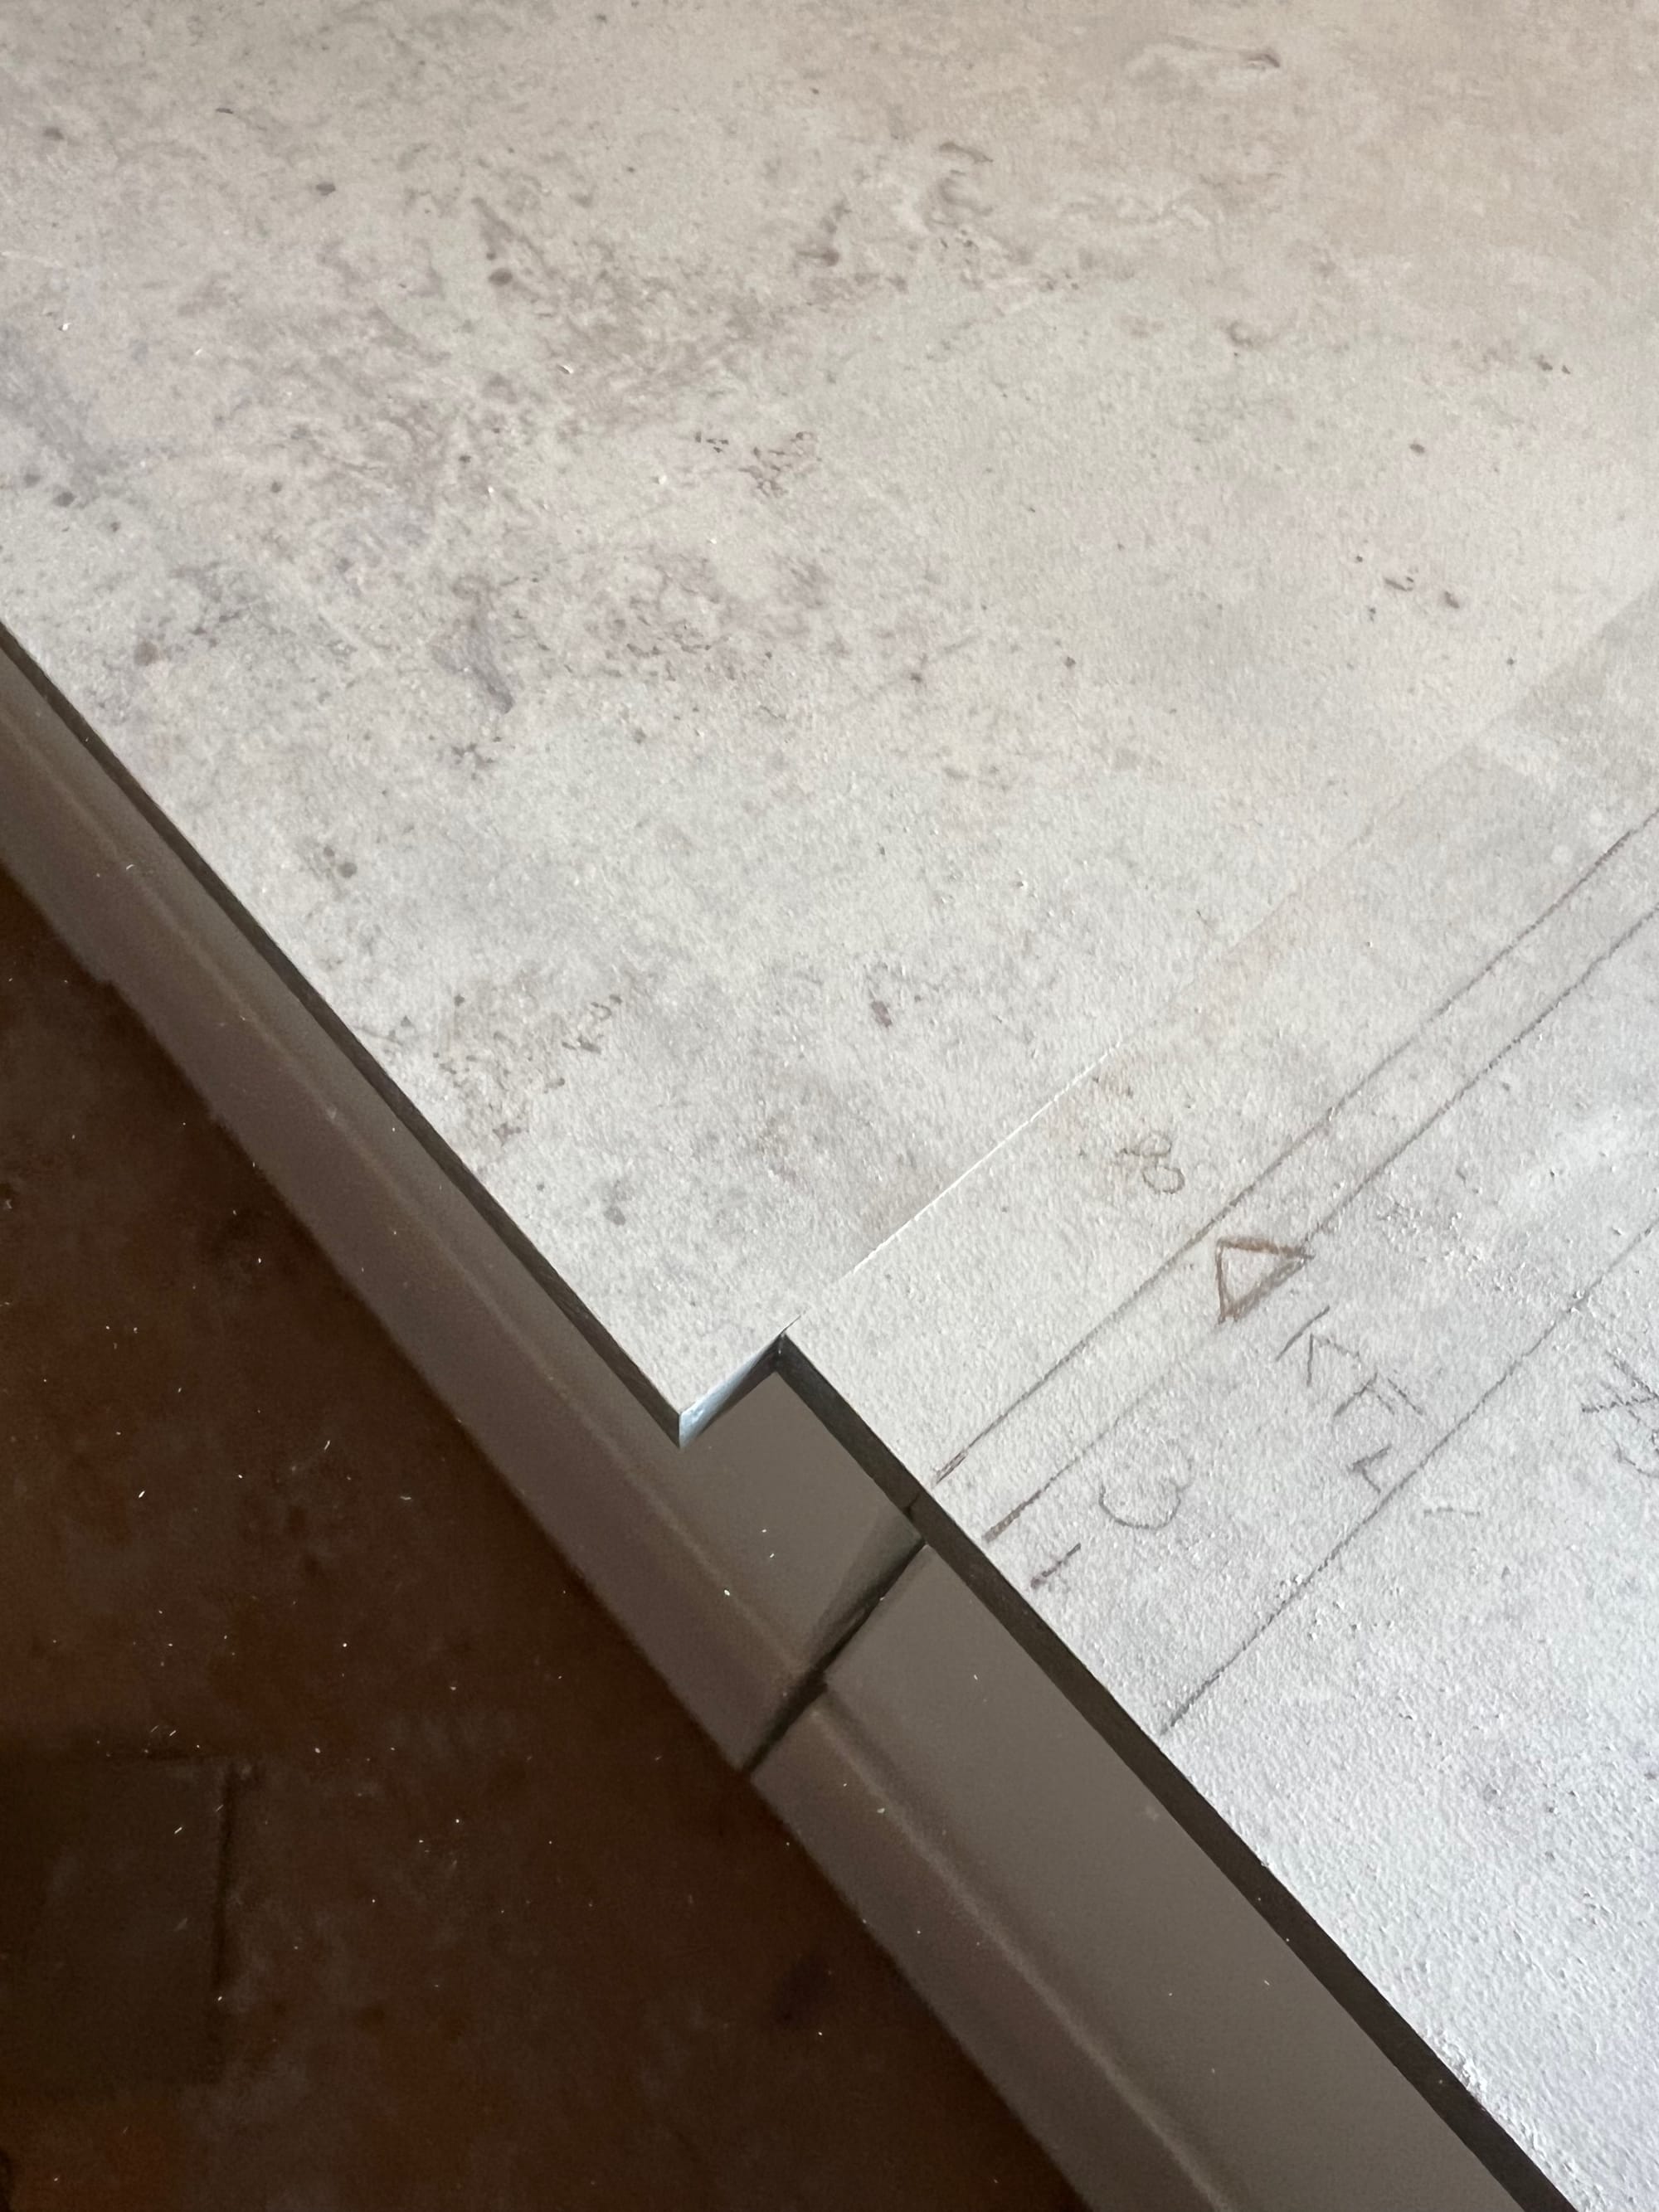
Next up was the left part of the worktop which didn’t need any cut-outs – we “only” needed to fit it to the crooked walls. Another (this time more basic) template helped and bit by bit we fiddled it into place. We initially planned to connect the two parts using connectors (💡 I just learned that the commonly used word in German “Lamello” is actually a brand name), but decided against the hassle. Of course this decision came with the compromise that the join is more visible, but it doesn’t bother us and if we want to make adjustments to the kitchen in the future, we can still remove the two parts of the worktop separately.


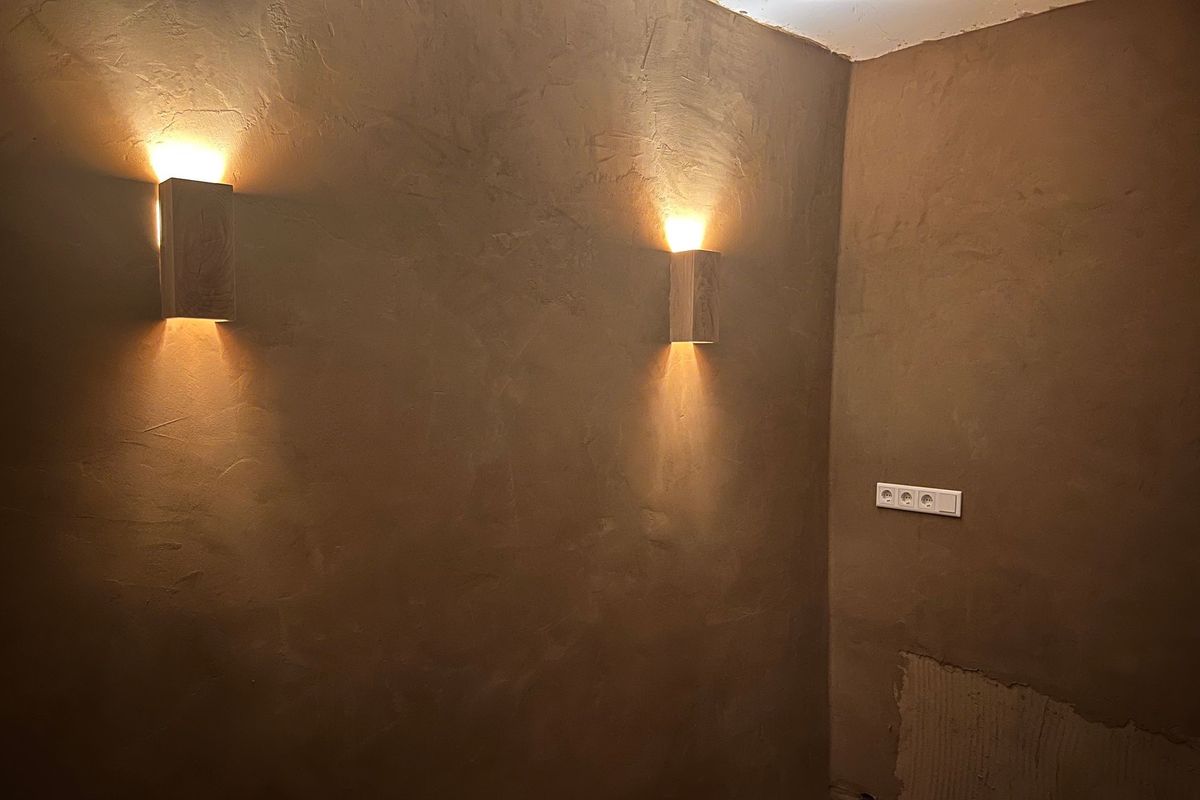
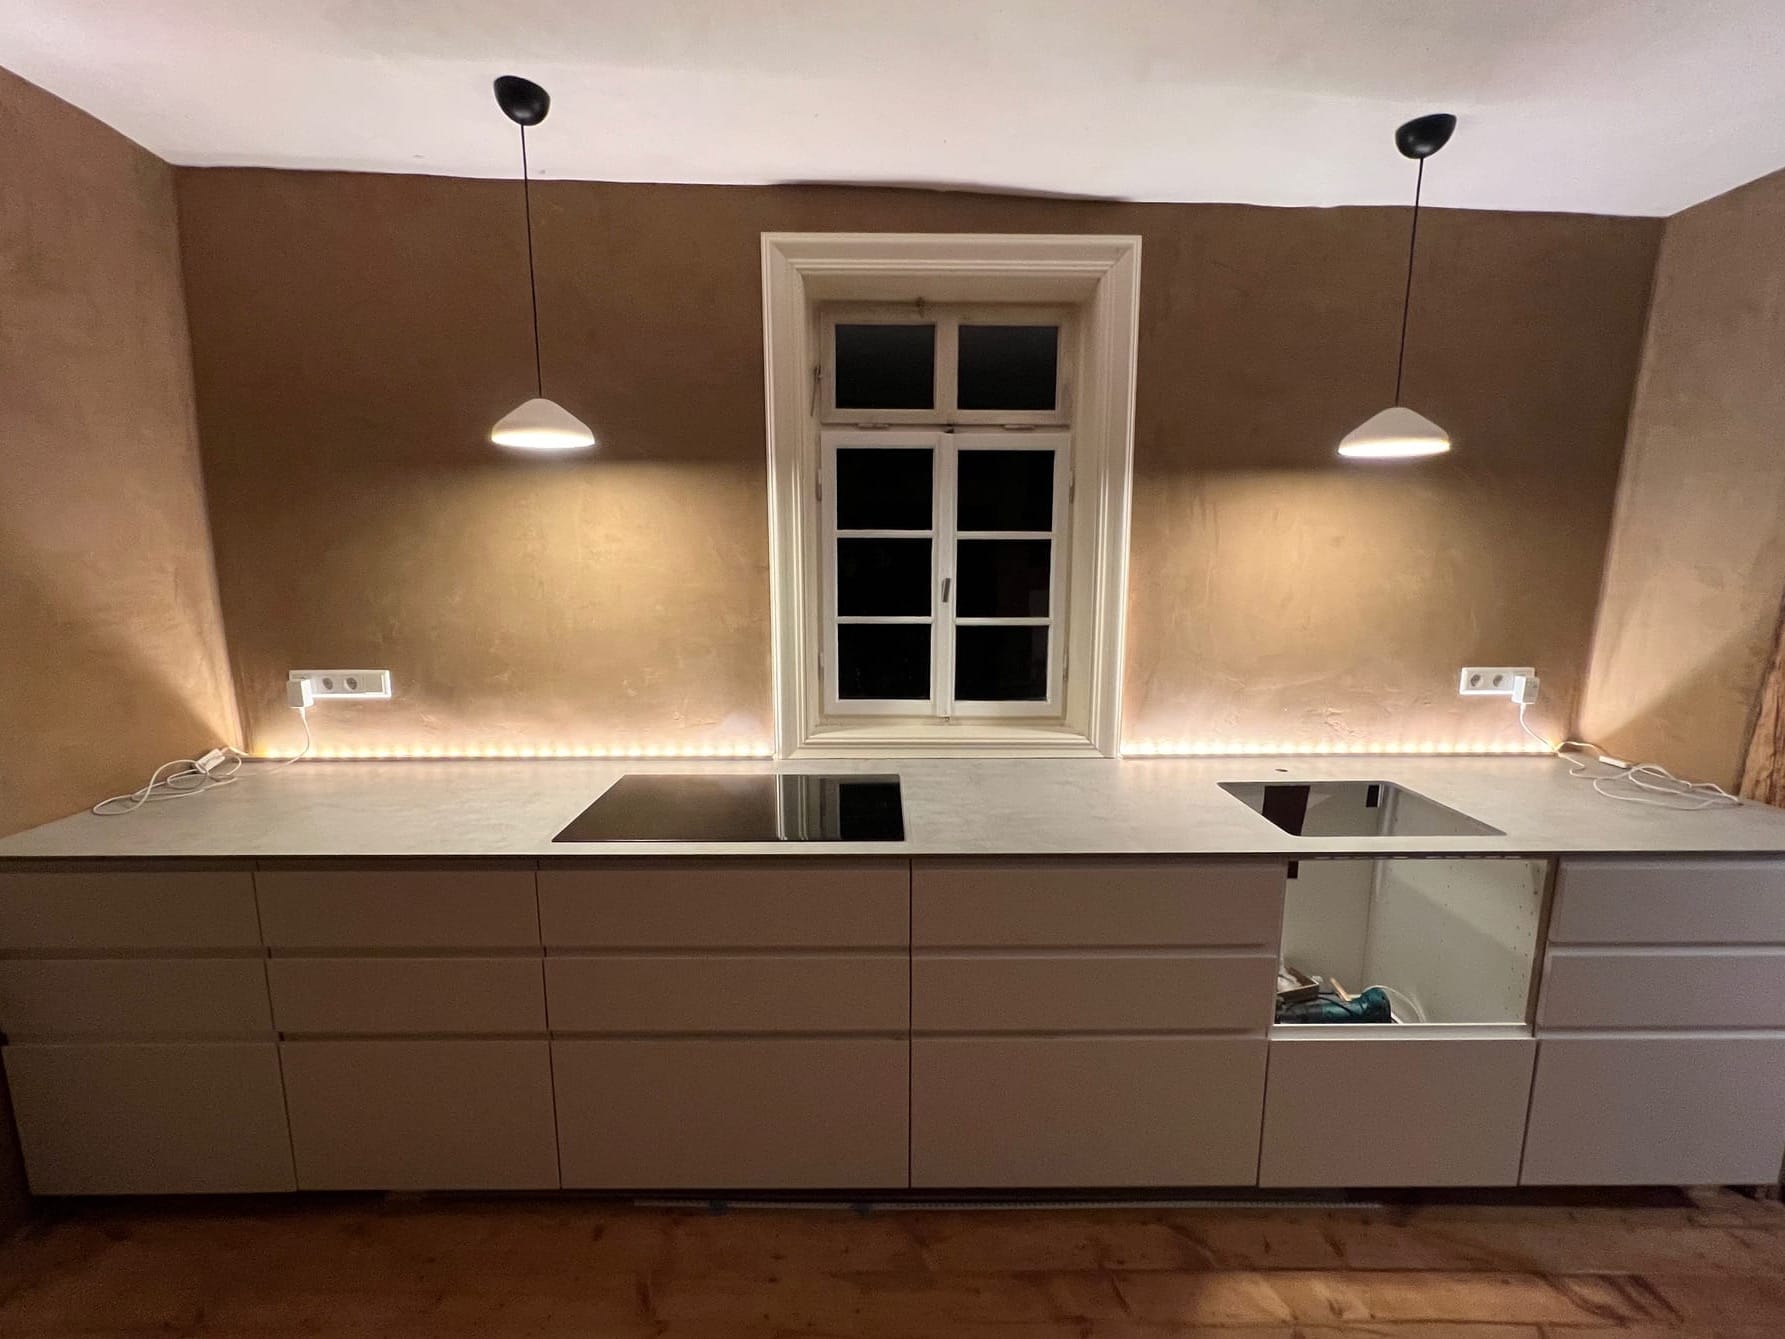
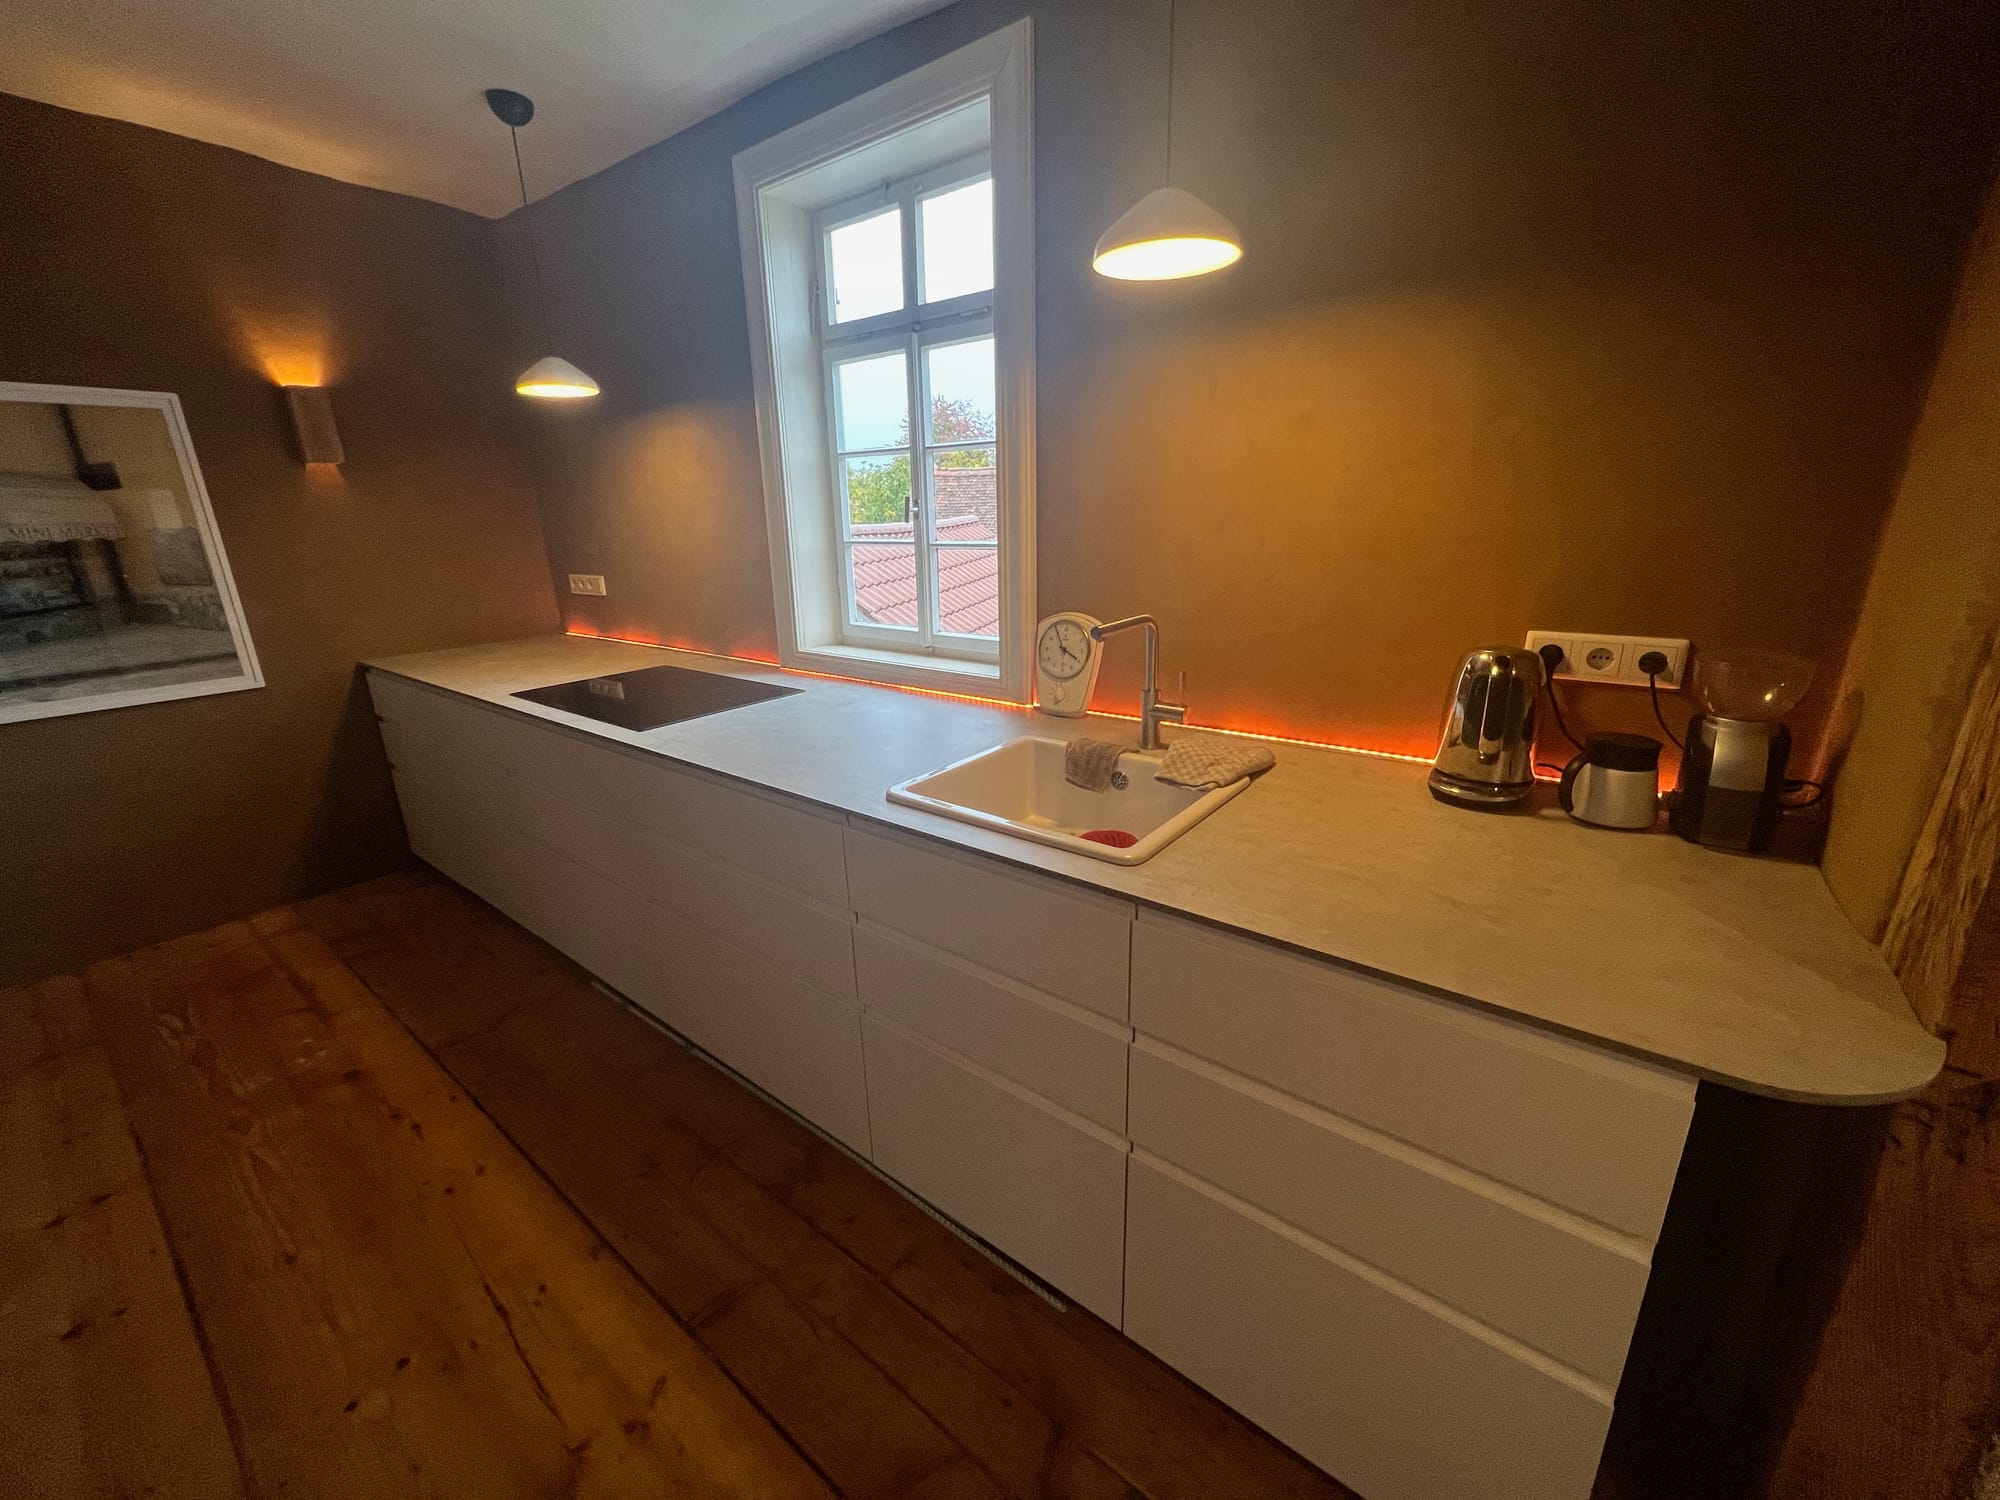
Lighting
Although we already had some lighting in place (see Episode III) we decided to add some more. Shoutout to my friend Inga who had shared her perspective on that – thank you ❤️.
As the walls and ceiling were already done and we needed to cover up the gap between worktop and the walls anyways, the idea of using light strips came into mind. To validate this could work I build a quick prototype using some light strips we already had.
As everyone in the family liked it, I started to refine the solution. There were three things that needed to be solved:
- Something to cover up the gap to the wall and to hide the light strip
- More even distribution of light – making the individual LEDs less visible
- A way to have a continuous strip of light that spans the whole worktop and is not interrupted by the window frame
In the end I went for aluminum profiles – featuring a diffusor – that hide the gap left and right of the window frame, house the light strip and create a more coherent light signature. I also decided to cut a small slot for the light strip below the window frame to achieve the continuous look.
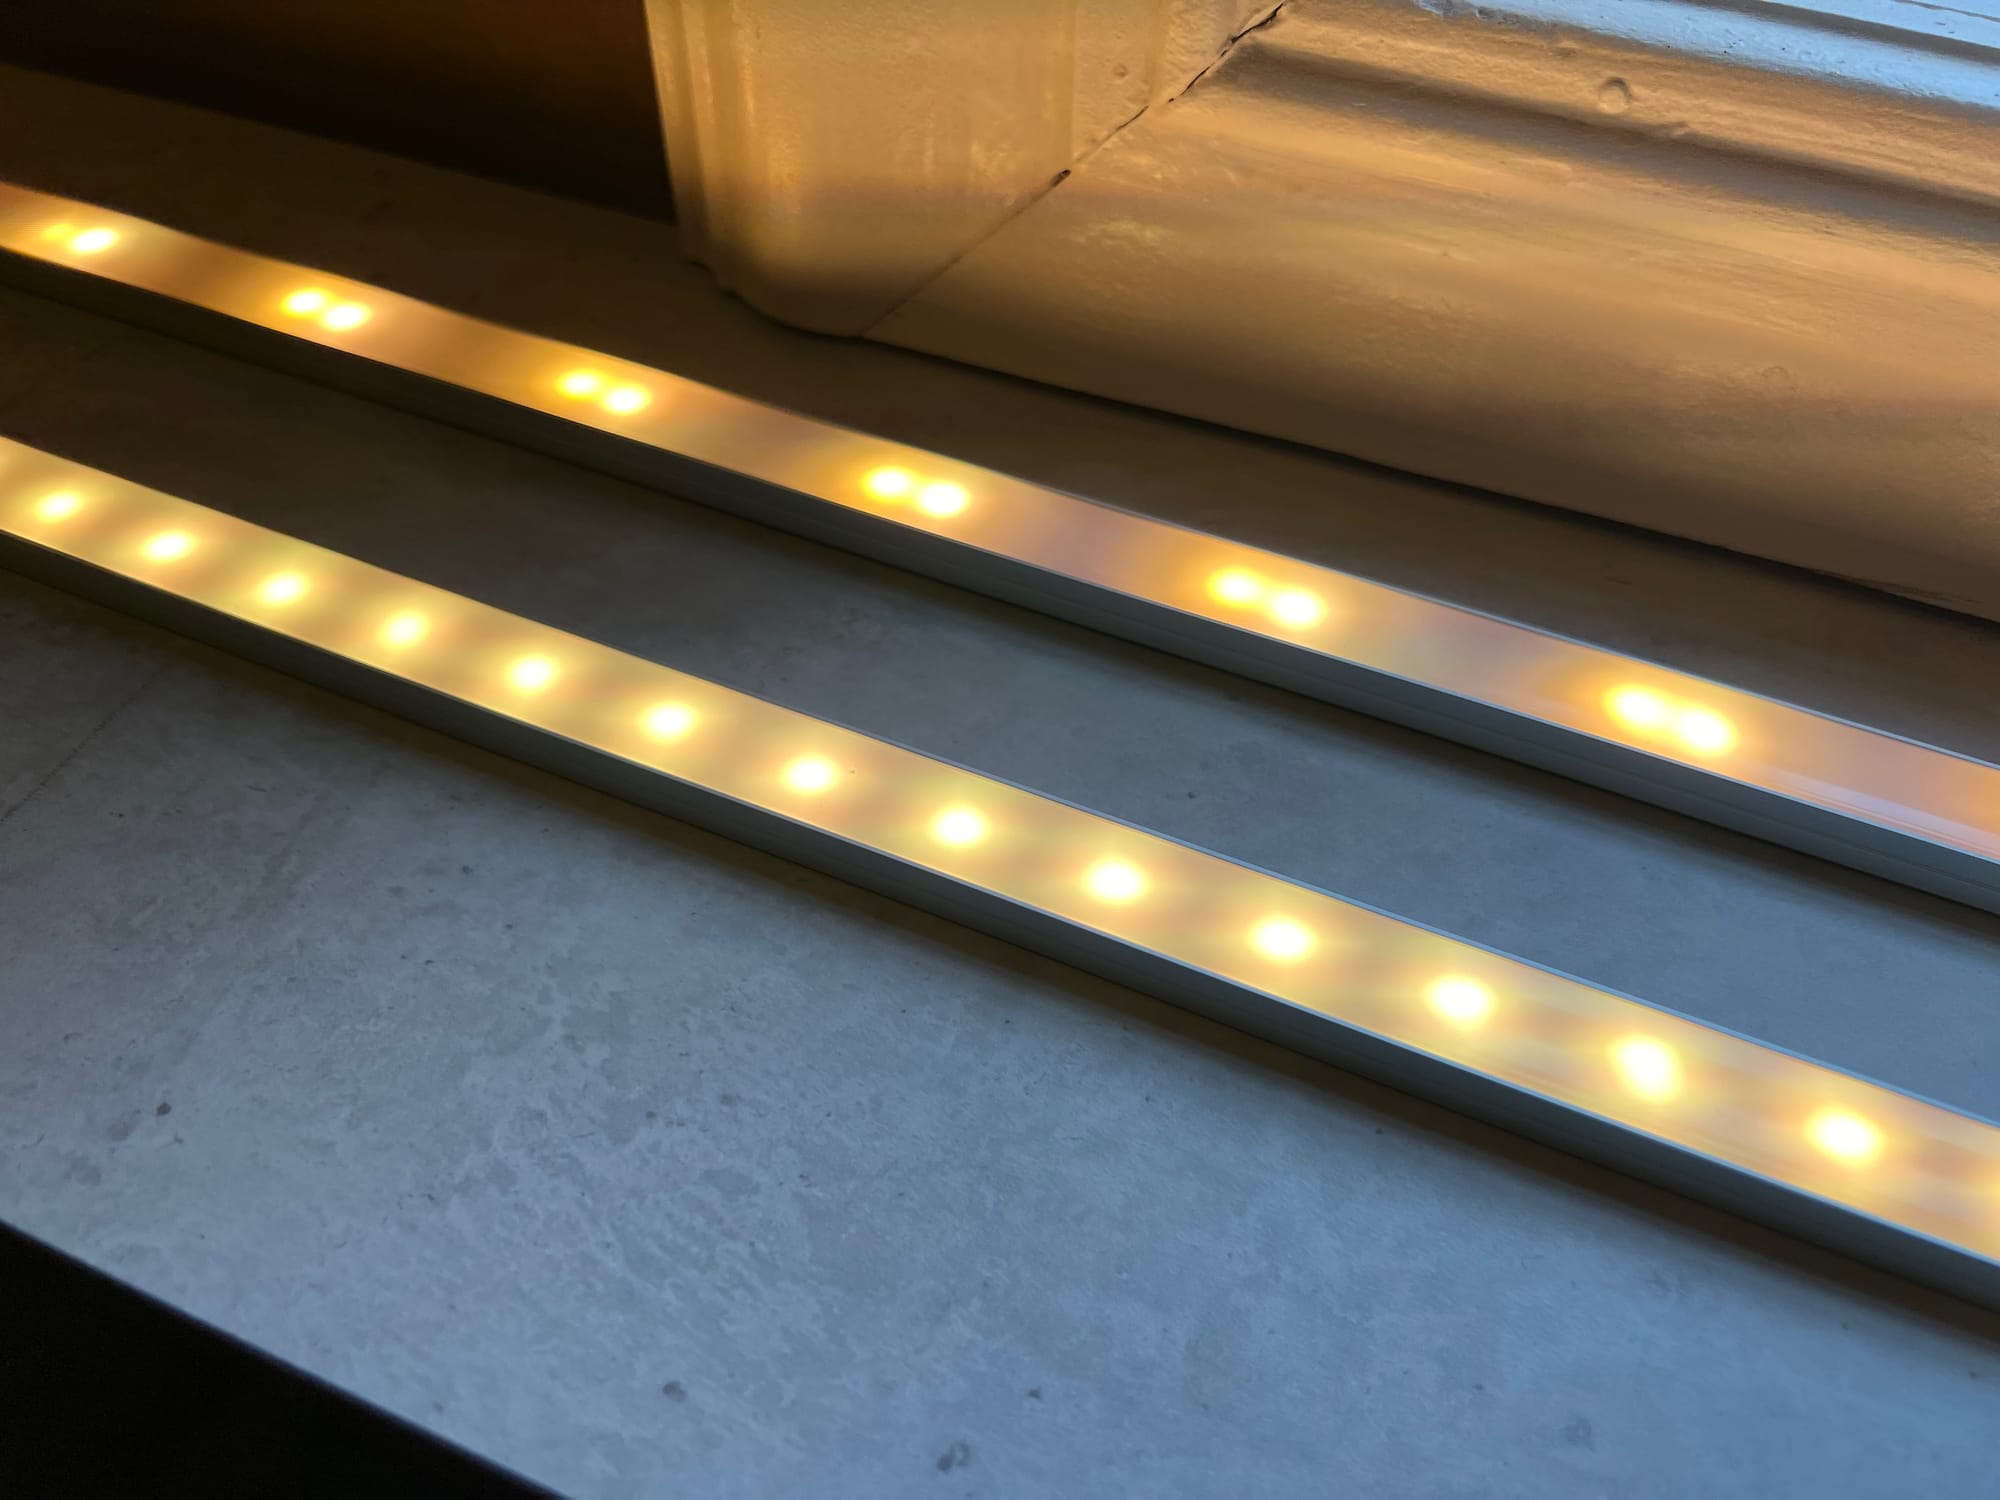
As for the light strip itself – we got the Philips Hue Gradient Ambiance in a total length of 4 meters. It features an additional diffusor (perfect for the center section below the window) and some fancy effects (that the kids love and you show off to your friends before you never use them again 🙃).
With this final touch our kitchen project finally came to an end. We are super happy with the result and as I’m writing this a year after we have completed it – the build also passed the test of everyday life 😃

I hope you enjoyed this episode and the series about the kitchen in general.
Take care ❤️
J